
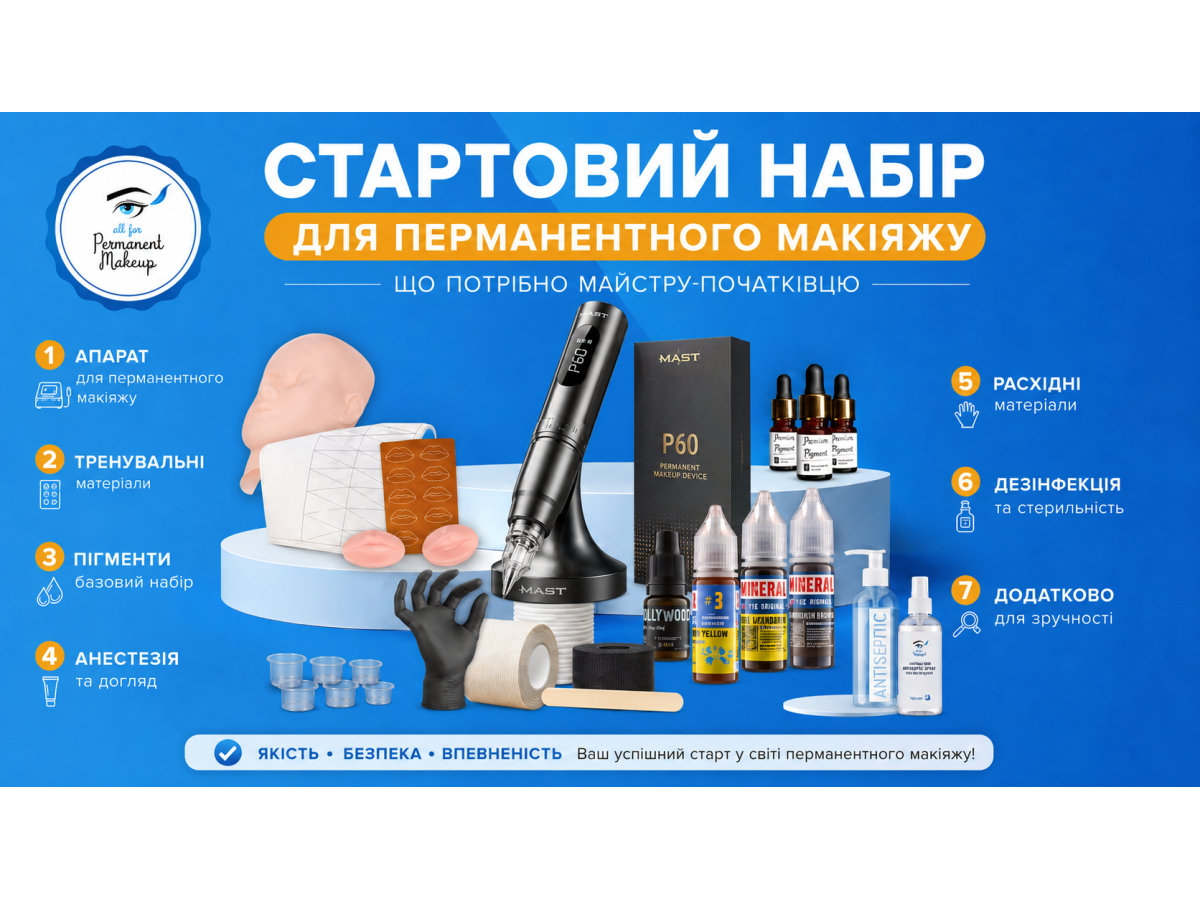
Beginners often want to buy everything at once: dozens of shades, a beautiful case, several machines, lamps, stands, anesthetics, accessories, and supplies “just in case.” But at the beginning, the right foundation matters more than quantity.
A good starter kit should cover three main tasks: performing the procedure safely, working comfortably in selected techniques, and achieving a stable healed result. Everything else can be purchased gradually when the artist better understands their style, client flow, and real needs.
In this article, we will look at what should be included in a PMU artist’s starter kit, what you should not save on, what can be bought later, and which mistakes beginners make most often.
Permanent makeup machine
The artist’s main tool is the machine. For a beginner, it is not necessary to buy the most expensive model, but it should be high quality, stable, and suitable specifically for PMU. The machine should have a smooth stroke, not overheat, sit comfortably in the hand, and be compatible with common cartridges.
A beginner should choose a universal machine suitable for brows, lips, and lash enhancement. A tattoo machine that is too powerful may be too aggressive for delicate facial areas, while one that is too weak may be unstable on dense skin.
A good starter option is a lightweight rotary machine or a professional PMU device with clear settings.
It is important to pay attention to weight, vibration, stroke length, needle depth adjustment, connection type, and ease of barrier protection. If the machine is difficult to cover with a barrier or process after the procedure, it will become a problem in daily work.
Power supply or battery
If the machine is wired, a reliable power supply is needed. It should hold voltage steadily, have clear adjustment, and be convenient to use while wearing gloves. Ideally, the screen should be easy to read, and the buttons should not be overly sensitive.
If the machine is wireless, a battery or replaceable batteries will be needed. It is important to consider the working time on one charge. During a lip procedure or complex brow work, the battery should not run out at the worst moment.
For a wireless format, it is best to have a spare battery. At the start, it is not necessary to buy many accessories, but stable power is an important part of quality. Unstable machine operation can affect pigment implantation, procedure speed, and client comfort.
Cartridges: basic configurations
Cartridges are supplies you should not save on. They must be sterile, disposable, individually packaged, clearly marked, within expiration date, and with an intact membrane if the design includes one.
A starter kit does not need every possible configuration. It is enough to build a base for the main areas:
- for brows: 1RL, 3RL, 3RS, or 5RS;
- for lips: 1RL or 3RL for contouring, 3RS/5RS or small Magnum/RM for filling;
- for lash enhancement: thin RL configurations;
- for practice: several options to understand the difference in pigment delivery.
A beginner should not start with very large Magnum configurations or complex needle groupings if the technique is not yet developed. A larger needle can cover the area faster, but it requires control of angle, pressure, and hand speed.
After the procedure, cartridges are disposed of as sharps waste. A special sharps container should be available in the working area.
Pigments for beginners
Pigments are one of the most complicated parts of a starter kit. Beginners often buy too many shades, then get confused, mix chaotically, and do not understand how each color heals. At the start, it is better to build a small but logical palette.
For brows, 3–4 shades are enough: light, medium, dark, and, if needed, a warm corrective shade. For lips, 3–5 shades: nude, pink, warm peach or coral, a more saturated berry shade, and a corrector for cool lips if the artist already understands color theory.
For eyelids, a separate dark pigment is needed, approved by the manufacturer for this area.
It is important not to buy pigments without composition, expiration date, batch number, and documents. Pigment is implanted into the skin, so it should be professional, intended for PMU, and purchased from a reliable supplier.
Anesthetic
Anesthetic is not always required, but it is usually included in a starter kit. Most often, artists use primary anesthetic before the procedure and secondary anesthetic during the procedure, if the instructions for the specific product allow it.
For beginners, it is important not to buy the “strongest” anesthetic only because of reviews. You need to check the composition, intended use, method of application, areas where the product may be used, expiration date, and restrictions. Special caution is needed when working on lips and eyelids.
Before the procedure, the client should be asked about allergies, reactions to anesthetics, pregnancy, breastfeeding, chronic conditions, medications, and tendency to swelling. If there are doubts, it is better to postpone the procedure and recommend a doctor’s consultation.
Barrier protection
Barrier protection is a mandatory part of the starter kit. It is not needed to make the workstation look nice, but to reduce the risk of cross-contamination. During a procedure, the artist touches the machine, cord, lamp, power supply, table, bottles, wipes, and the client’s skin.
Everything in the working area that may be touched with gloves should be covered or processed after the procedure.
The starter kit should include:
- barrier bags for the machine;
- sleeves for the cord;
- barrier film for the power supply, lamp, and work surfaces;
- disposable drapes;
- covers for the bed and headrest;
- protection for the table or tray;
- disposable pigment cups;
- waste bags or containers.
A barrier does not replace disinfection. It only protects the surface from direct contamination. After each client, barriers are removed and discarded, while surfaces are checked and processed.
Gloves, masks, and disposable materials
Gloves are needed in large quantities. Beginners often underestimate how many are used: gloves are changed not only between clients, but also during a procedure if the artist touches a phone, opens a cabinet, damages a glove, leaves the working area, or moves from a dirty stage to a clean one.
Masks, caps, disposable aprons or gowns, cotton swabs, microbrushes, lint-free wipes, cotton pads, disposable sheets, spatulas, anesthetic film if used according to instructions, and a sharps container are also needed.
These supplies should not be reduced at the expense of safety. They run out quickly, so it is better to keep a stock.
Disinfection and surface processing
The starter kit should include products for processing skin, surfaces, and tools if the studio has reusable items. It is important to distinguish between a skin antiseptic and a surface disinfectant — they are not the same thing.
For work, you will need:
- hand antiseptic;
- skin preparation product before the procedure;
- surface disinfectant;
- wipes or disposable materials for processing;
- waste containers;
- sharps container;
- cleaning instructions or workstation protocol.
The artist should understand exactly what they are processing, with which product, in what concentration, and with what exposure time. Simply “wiping with something” is not enough.
Sketching tools
To build the shape, pencils, rulers, threads, paste, or sketch markers are needed. But it is important to remember: everything that contacts the client’s skin should be clean, disposable, or processed according to the rules.
For brows, a ruler, mapping thread, white or brown pencil, and sketch paste may be useful. For lips, contour pencils, cotton swabs, and microbrushes are needed. For eyelids, thin markers or tools that allow precise marking without pressure on the skin may be used.
A beginner does not need to buy dozens of sketching tools. It is better to choose a few convenient ones and learn to use them confidently.
Lighting and workstation
Good lighting is a mandatory part of a starter kit. Without proper light, the artist sees the skin, pigment residue, symmetry, saturation, and small details worse. The lamp should provide even light without strong shadows, be easy to adjust, and not interfere with the artist during work.
A comfortable treatment bed, artist chair, table or trolley, containers for supplies, and an area for clean materials are also needed. The workstation should be organized so that the artist does not open cabinets or search for materials during the procedure with contaminated gloves.
The ideal logic is simple: before the procedure begins, everything needed is already laid out, the clean zone is separated from the working zone, and there are no unnecessary items nearby.
Training materials and practice
A starter kit is not only equipment. A beginner needs artificial skin, training materials, diagrams, procedure protocols, client cards, consent forms, aftercare instructions, and a template for documenting healed results.
Artificial skin can be used to practice lines, pixels, shading, even lip coverage, lash enhancement, and depth control. This is cheaper and safer than learning on clients.
It is also important to keep records: which pigment was used, which needle, which technique, how many passes, how the skin reacted, and how the result healed. These notes quickly turn a beginner into a more systematic artist.
What can be bought later
Not everything needs to be purchased at once. At the beginning, you can postpone:
- a large pigment palette;
- several machines;
- expensive organizers;
- dozens of cartridge types;
- complex corrector mixes;
- professional photo equipment;
- extra lamps;
- rare accessories for non-standard techniques.
First, it is better to invest in the foundation: a quality machine, good cartridges, safe pigments, supplies, barriers, disinfection, lighting, and training. Everything else can be purchased for real tasks later.
What you should not save on
There are items where saving money can cost too much. These include cartridges, pigments, barrier protection, gloves, disinfection, a sharps container, and training.
A cheap machine may have an unstable stroke. Questionable cartridges may traumatize the skin or give uneven pigment delivery. Unverified pigments bring a risk of unpredictable healing and safety issues. Lack of barrier protection increases the risk of contaminating equipment and surfaces.
A beginner is better off buying less, but better quality. A starter kit does not need to be huge. It needs to be safe and workable.
Common mistakes when building a starter kit
The first mistake is buying everything from an online list. Not every list suits your technique, country, training, and budget.
The second mistake is spending most of the budget on a beautiful machine and forgetting about supplies. Without cartridges, barriers, gloves, and disinfection, the procedure is impossible.
The third mistake is buying too many pigments. A large palette without experience only creates confusion.
The fourth mistake is ignoring sanitary requirements. PMU is an invasive procedure, not just makeup.
The fifth mistake is choosing products only by price. The cheapest option is rarely the best for stable and safe work.
Minimum starter list
A basic starter kit may look like this:
- PMU machine;
- power supply or batteries;
- basic cartridges for brows, lips, and lash enhancement;
- 3–4 brow pigments;
- 3–5 lip pigments;
- dark pigment for eyelids, if you work with this area;
- primary and/or secondary anesthetic;
- gloves, masks, disposable drapes;
- barrier protection for the machine, cord, lamp, and table;
- pigment cups;
- wipes, cotton swabs, microbrushes;
- hand and skin antiseptic;
- surface disinfection;
- sharps container;
- sketching tools;
- lamp;
- treatment bed, chair, and work table;
- artificial skin for practice;
- client cards and aftercare instructions.
This list can be adapted to the direction of work. If the artist starts only with brows, the kit will be smaller. If lips and eyelids are added immediately, more supplies and configurations will be needed.
Conclusion
A starter kit for permanent makeup should not be the biggest one, but the most logical one. A beginner needs to build a foundation that allows safe, clean, and predictable work: machine, cartridges, pigments, anesthetic, barrier protection, disinfection, disposable materials, lighting, and sketching tools.
The main principle is safety and quality first, then aesthetics and extra accessories. It is better to start with a small but well-thought-out kit than to buy many random products without understanding how to use them.
A professional PMU artist does not begin with a beautiful case, but with a system: a clean workstation, verified materials, a clear protocol, careful technique, and attentive client care.