
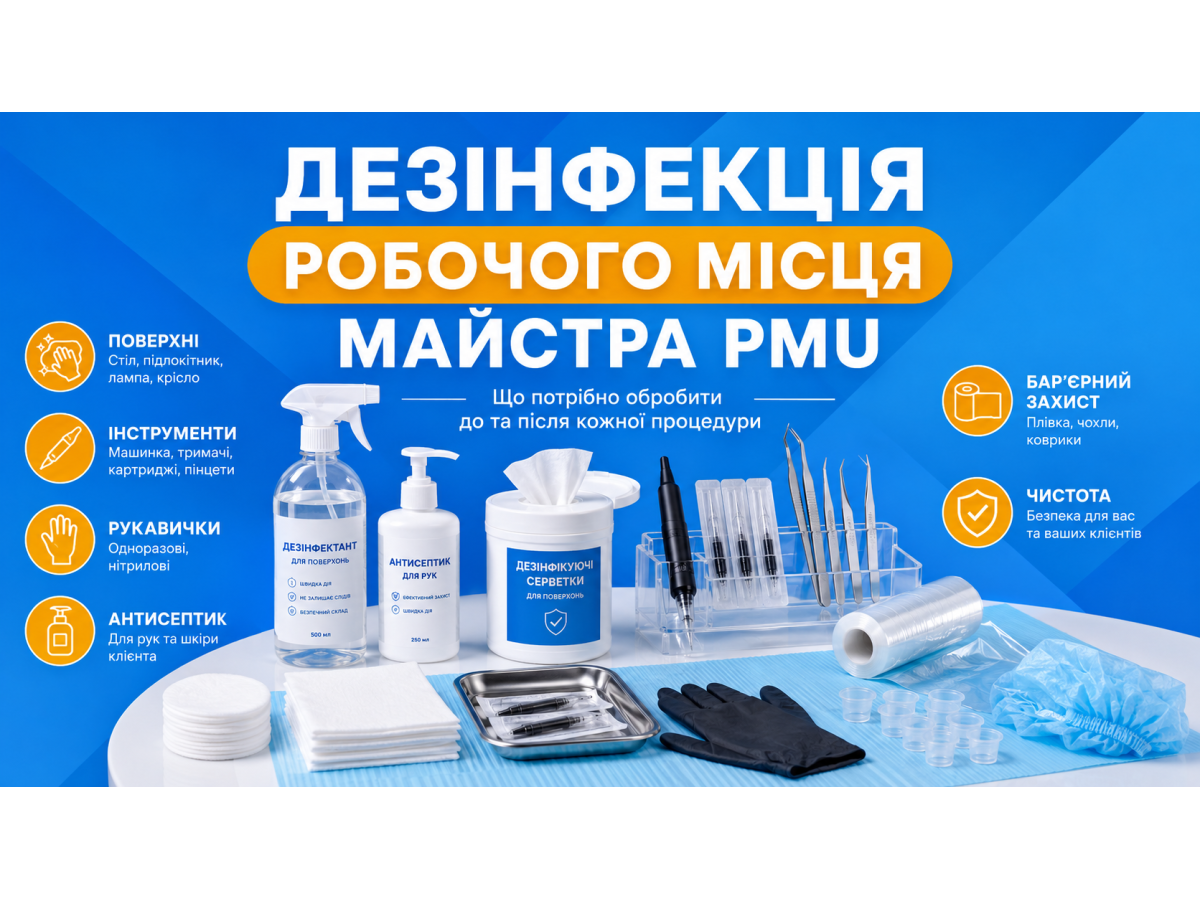
Permanent makeup involves breaking the skin barrier and contact with biological fluids, pigments, cartridges, wipes, gloves, and working surfaces. That is why order on the table, barrier protection, and proper disinfection should be part of the daily protocol.
In PMU, it is not enough to simply “wipe the treatment bed” or “clean up after the client.” The artist must understand which surfaces become contaminated during the procedure, what needs to be covered with a barrier, which materials are disposable, how to dispose of cartridges, and when to change gloves.
Any procedure that breaks the skin requires clear infection control. For a PMU artist, this means a systematic approach to preparation, work during the procedure, and cleaning after the client.
Why disinfection in PMU is so important
During the procedure, the artist touches more than just the client’s skin. The workflow involves a machine, cord or battery, power supply, lamp, pigment bottles, cups, wipes, anesthetic, sketching tools, phone, table, treatment bed, and other surfaces.
If clean and working zones are not separated, contamination can easily transfer from one item to another.
The biggest mistake is thinking that danger exists only where blood is visible. In PMU, artists often work with microdroplets of fluid, pigment, and lymph that can remain on gloves, wipes, the machine body, or the table surface.
A workstation may look clean visually, but that does not mean it is safe. That is why disinfection should include three stages: preparing the area before the client, controlling cleanliness during the procedure, and proper cleaning after the work is finished.
Clean zone and working zone
A professional PMU room should have clear zoning. The clean zone is where sterile cartridges, closed pigments, disposable materials, clean gloves, masks, drapes, barrier film, and other prepared supplies are stored.
The working zone is the table or tray where everything used during the procedure is placed.
The main rule: during the procedure, the artist should not open cabinets, take new materials from the clean zone with contaminated gloves, or touch personal belongings.
If something was forgotten, the artist should remove gloves, clean their hands, take the needed material, and put on new gloves.
For a beginner, this may seem excessive, but these details create a safe protocol. When clean and contaminated areas are mixed, post-procedure disinfection no longer compensates for mistakes made during the procedure.
What should be covered with a barrier
Barrier protection is needed for all surfaces and objects that the artist may touch during the procedure. It is not a replacement for disinfection, but an additional layer of protection from direct contamination.
It is important to cover:
- the machine or handpiece;
- the machine cord;
- the battery or parts of the power supply if they are touched;
- the lamp, especially adjustment handles;
- the work table or tray;
- the treatment bed and headrest;
- bottles that may be placed in the working zone;
- spray bottles, if used;
- surfaces the artist touches while wearing gloves.
After the client, barriers are removed carefully without touching clean surfaces with the contaminated outer side, and then discarded immediately. After that, surfaces still need to be treated with a disinfectant.
A barrier protects, but it does not make an item automatically sterile.
Surface disinfection: what is important to know
For surfaces, products intended specifically for surface disinfection should be used, not hand antiseptic or a random alcohol solution.
The product should have clear instructions, spectrum of action, concentration, contact time, and safe-use rules.
For invasive procedures, it is important to choose not just a “cleaning spray,” but a disinfectant with the proper purpose. Surfaces that may contact biological fluids should be treated with products suitable for that type of risk.
A common mistake is applying the product and immediately wiping it dry. Most disinfectants require a certain contact time with the surface. If the instructions specify 1, 3, 5, or 10 minutes, the surface should remain wet during that time.
Cleaning versus disinfection
Cleaning and disinfection are not the same. Cleaning removes visible contamination: dust, pigment residue, drops, pencil marks, cream, or anesthetic.
Disinfection reduces the number of microorganisms on the surface.
If a surface is contaminated with pigment or biological fluid, it should first be cleaned and then disinfected. If disinfectant is applied directly to a dirty surface, organic residue may reduce its effectiveness.
The practical algorithm is simple: remove disposable materials, clean visible contamination, apply disinfectant, observe the required contact time, and allow the surface to dry or process it according to the manufacturer’s instructions.
Gloves: when they should be changed
Gloves do not make the work safe automatically. They protect only when the artist uses them correctly.
If the same gloves are used to touch the client’s skin, machine, phone, door handle, clean materials, and pigment bottle, the gloves become a carrier of contamination.
Gloves should be changed:
- before starting the procedure;
- after touching a phone or personal belongings;
- after opening cabinets, doors, or drawers;
- if a glove tears or becomes contaminated;
- after contact with waste;
- before moving from a dirty stage to a clean one;
- after finishing the procedure before cleaning, if a new pair is needed.
After removing gloves, hands should be cleaned. Gloves do not replace hand hygiene.
Cartridges and sharps waste
PMU cartridges are disposable. They are not washed, disinfected for reuse, or kept “for practice.” After the procedure, the used cartridge should go into a sharps container.
Cartridges and other disposable sharp items should not be left in regular trash, on the table, or inside wipes.
The sharps container should be puncture-resistant, closable, and placed in an accessible location. The artist should not carry a used cartridge across the entire room by hand.
Pigments, cups, and bottles
Pigments also require proper organization. Pigment cups should be disposable. Leftover pigment after the procedure should not be returned to the bottle or saved for another client.
Everything that was in the working zone during the procedure should be considered potentially contaminated.
A pigment bottle should not be placed directly in an area with contaminated wipes or used materials. If the bottle needs to be picked up during the procedure, this should be done with clean gloves or through a barrier.
Some artists prepare the needed amount of pigment in cups in advance so they do not need to touch the bottles during work.
It is also important to monitor the expiration date, cleanliness of the bottle tip, and storage conditions. Pigment is implanted into the skin, so carelessness with the bottle is unacceptable.
Cleaning after the client: the correct sequence
After the procedure is finished, items should not be placed chaotically on the table. It is better to follow a clear sequence:
- Dispose of the cartridge in a sharps container.
- Discard used wipes, cups, drapes, and disposable materials.
- Carefully remove barriers from the machine, cord, lamp, table, and other surfaces.
- Remove gloves, clean hands, and put on a new pair for cleaning.
- Clean visible contamination.
- Apply disinfectant to surfaces.
- Observe the contact time according to the instructions.
- Prepare a clean area for the next client.
This algorithm helps avoid missing important areas and prevents transferring contamination from one item to another.
What should be disinfected after each client
After each procedure, not only the treatment bed and table should be disinfected. The list should include all surfaces the artist touched or may have touched during work:
- work table or tray;
- lamp and adjustment handles;
- treatment bed, headrest, armrests;
- artist’s chair;
- power supply or battery area;
- external parts of the machine, if allowed by the instructions;
- surfaces near the client;
- container handles, if touched;
- any reusable sketching tools.
If a surface was covered with a barrier, that does not cancel inspection and disinfection. The barrier may have torn, shifted, or been removed incorrectly.
Common mistakes artists make
The first mistake is assuming that a workstation that looks clean is already safe. Visible cleanliness is not the same as disinfection.
The second is using one product for everything: hands, client’s skin, table, treatment bed, and tools. Different tasks require different products.
The third is not observing the contact time. If disinfectant is wiped off immediately, it may not perform its function.
The fourth is touching the phone while wearing gloves. A phone easily becomes a “bridge” between dirty and clean zones.
The fifth is not covering the lamp, cord, or power supply, even though the artist touches them repeatedly during the procedure.
The sixth is throwing cartridges into regular trash. This is dangerous for the artist, cleaner, and anyone who may come into contact with waste.
Checklist before the procedure
Before the client arrives, it is worth checking:
- surfaces are cleaned and disinfected;
- the clean zone is separated from the working zone;
- the machine, cord, lamp, and table are covered with barriers;
- sterile cartridges are prepared;
- disposable pigment cups are available;
- gloves, masks, wipes, and drapes are within reach;
- the sharps container is accessible;
- disinfectant and antiseptic are not expired;
- all unnecessary items are removed from the work surface.
When everything is prepared in advance, the artist does not need to search for materials during the procedure and break the cleanliness of the workflow.
Conclusion
Disinfection of a PMU artist’s workstation is a system, not a single action. It starts before the client arrives: with preparation of the clean zone, barrier protection, checking supplies, and proper placement of tools.
During the procedure, the artist monitors gloves, avoids touching unnecessary objects, and does not mix clean and contaminated items. After the procedure, disposable materials are discarded, surfaces are disinfected, and the room is prepared for the next client.
Professional PMU is not only beautiful brow shape, an even lip contour, or neat lash enhancement. It is also a safe workflow where every surface, every glove, every cartridge, and every barrier has its place.
The clearer the disinfection protocol, the calmer the artist works and the more trust the client feels. Safety should be built into every procedure from the first minute.